Dear readers,
Today, I’m sharing a long-delayed post for a hack I saw in New York City shop window back in 2017! There are many reasons why this took so long. First, I pitched it to Sew News; it was accepted. I made the shirt and wrote the tutorial, but I put the sample in a yellow envelope that got wet, and the shirt was stained right in the front 😢. So the sample could not be photographed, and the article was never published. Last year, I finally got the courage to re-cut the front panel and the button band, but I moved overseas before doing the buttonholes, and it took me one more year to get to those. Clearly, this shirt seemed doomed…
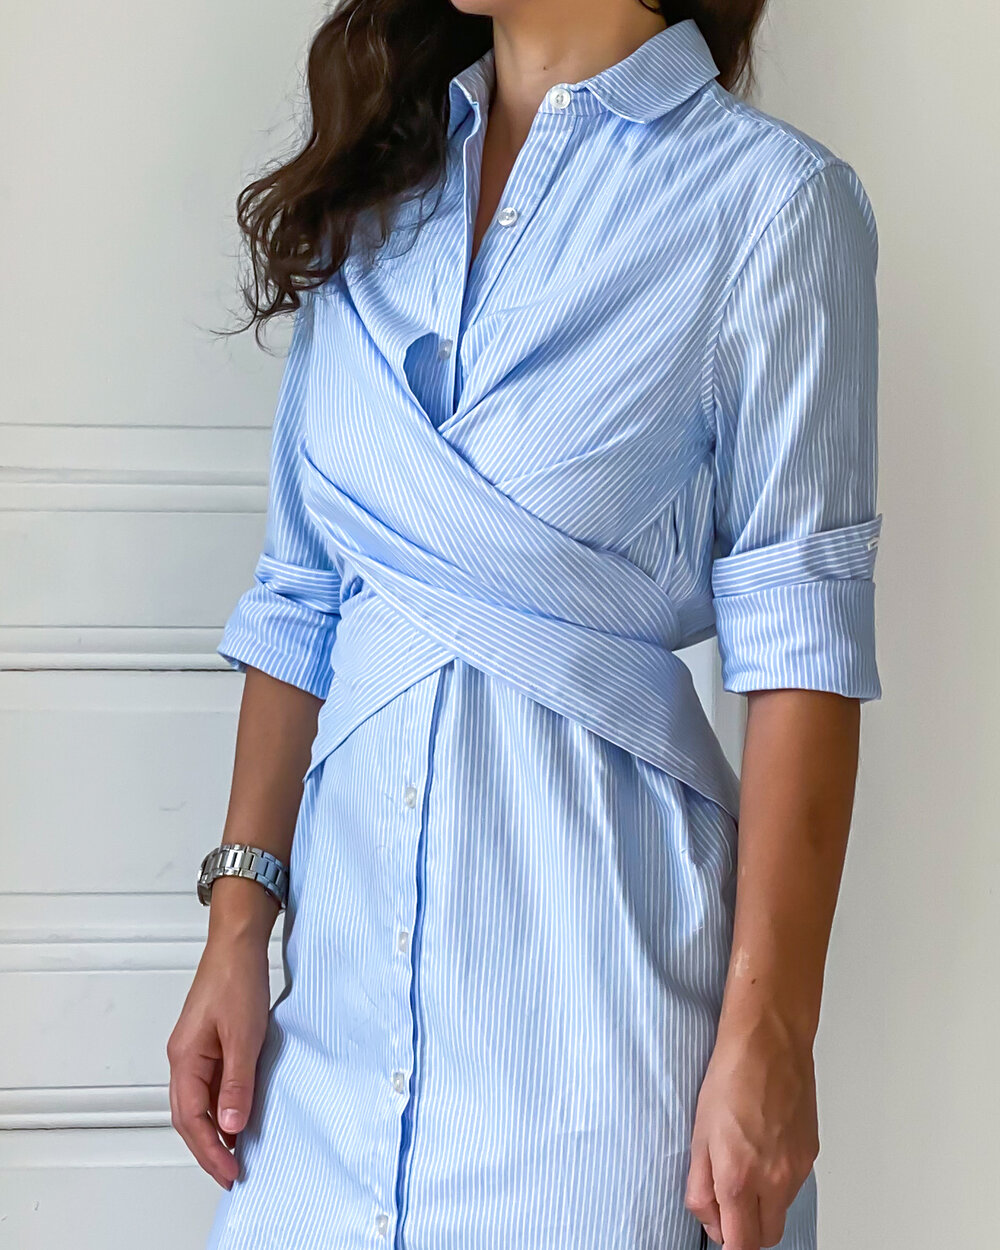

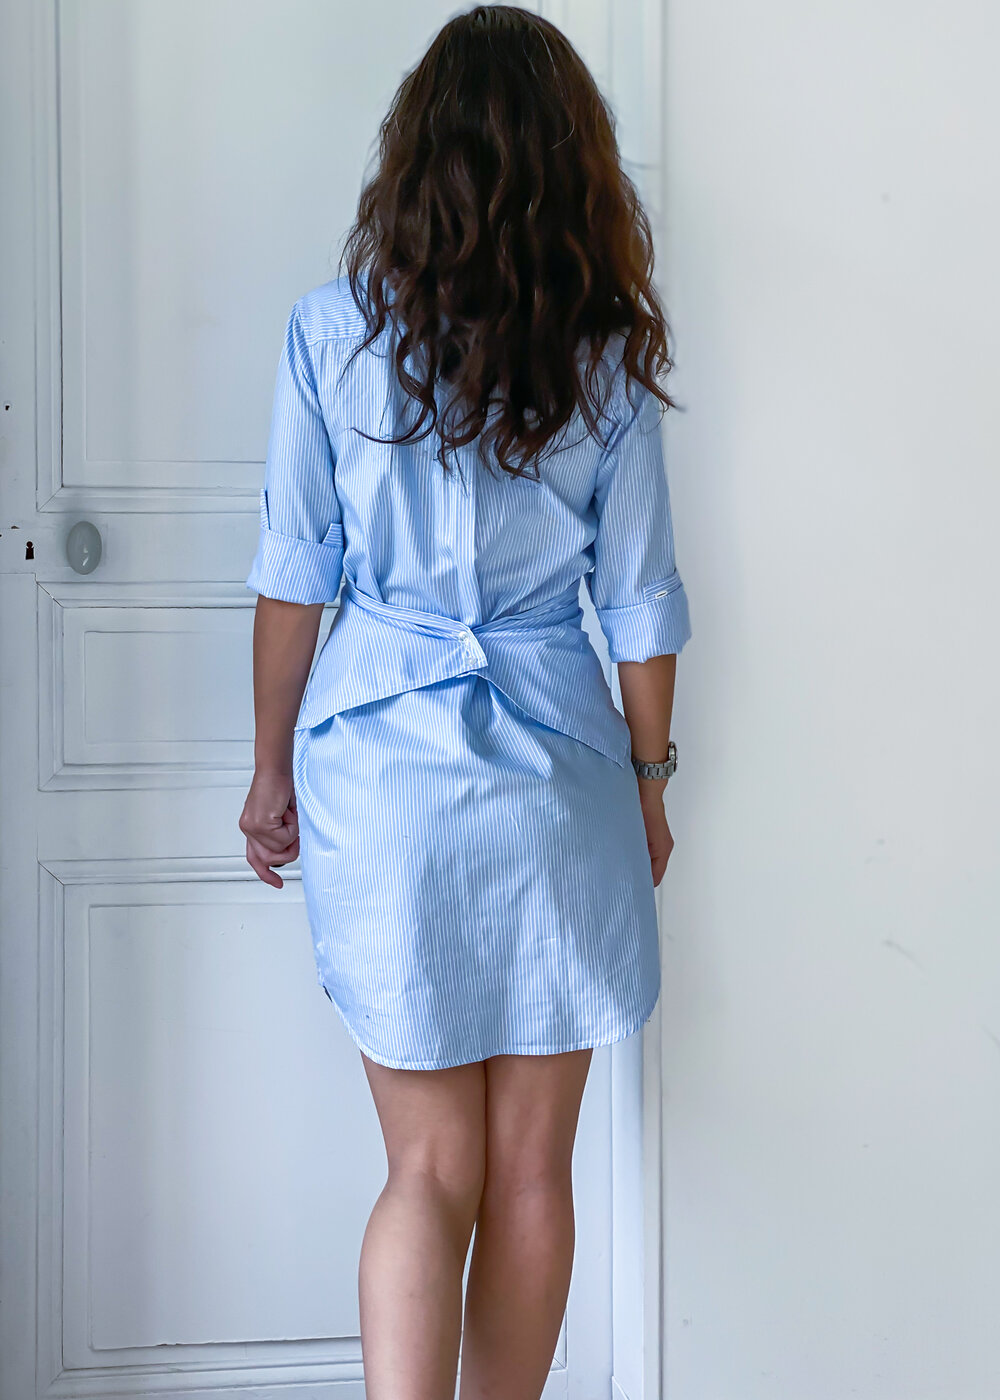
But here we are, and I’m so happy to be able to share it with you finally. I think it’s a relatively simple hack for a high-impact. Although the draped effect seems intricate, it is achieved by simply adding panels to the front of your shirt that can be buttoned at the back. The buttons give the flexibility to create a tight or a loose effect to the draped panels. You can also leave the panels unbuttoned for a casual and completely different look.


Supplies
Shirt Pattern with a relaxed fit. I used the Archer Shirt by Grainline Studio.
Shirting Fabric (Amount according to pattern envelope + 1 yard). Mine is from Moods Fabric in New York.
Mid-weight fusible interfacing (appropriate for your fabric)
16 buttons
Thread: matching, all-purpose
Pattern Paper

Prepare
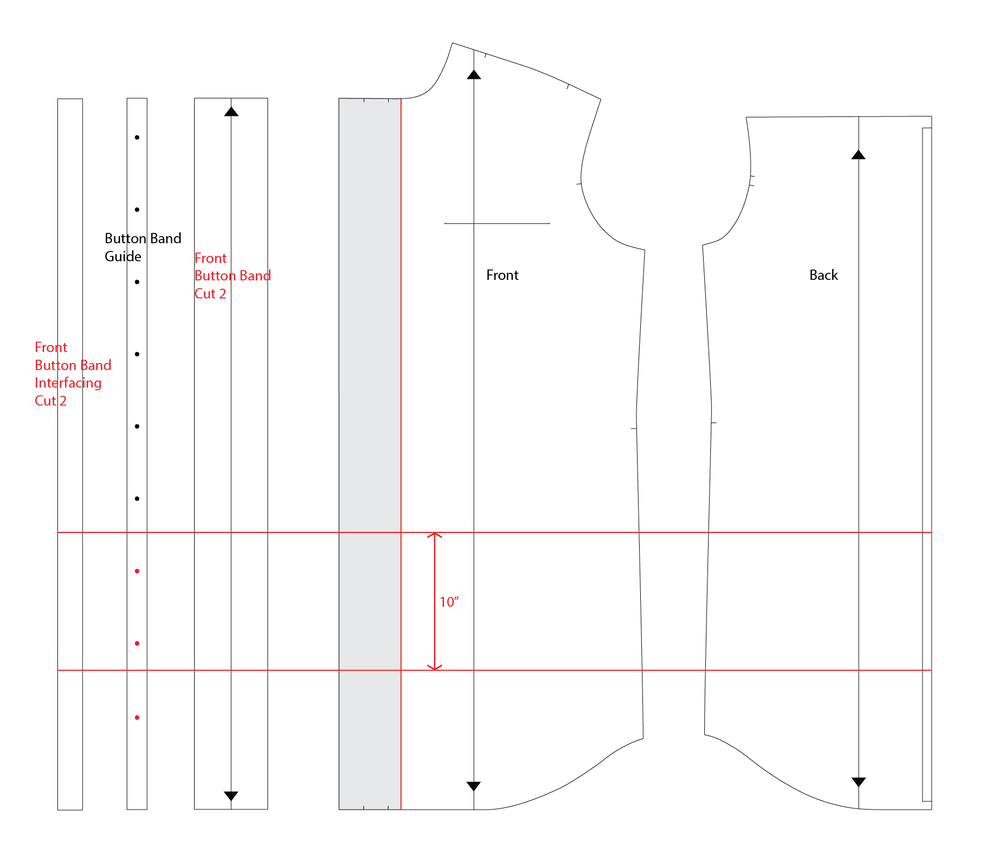
Start by determining how much you need to lengthen the shirt to the desired length of the shirtdress. Be mindful that the draped effect will hike up the dress a little, and it may appear 1 or 2 inches shorter than initially intended. Here, I use 10” (25cm).
Alter
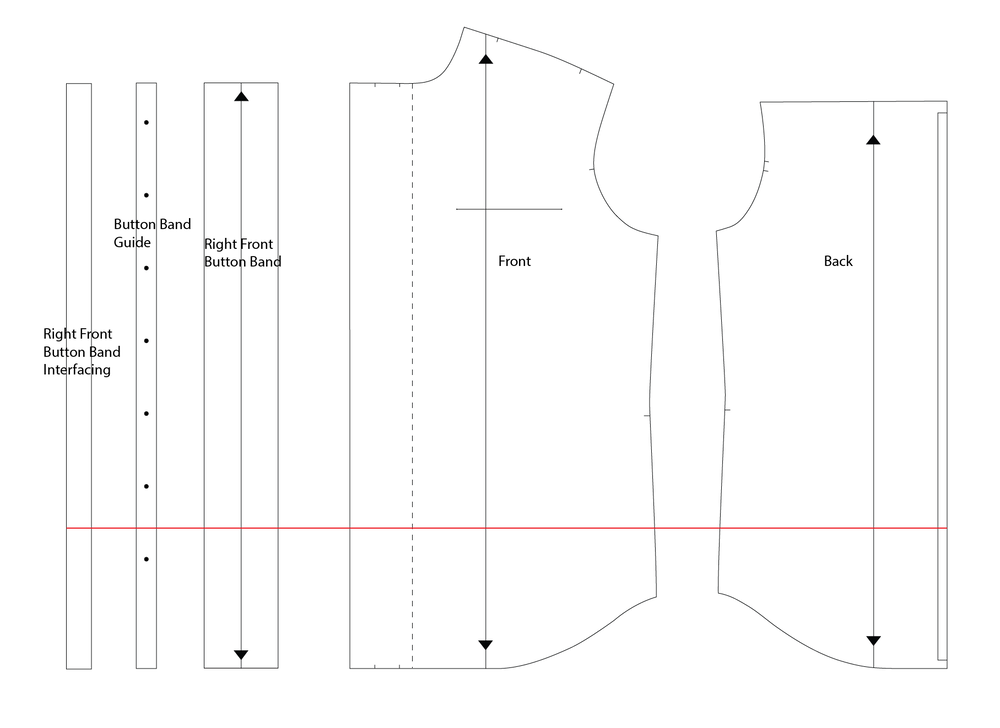
Extend the following pattern pieces by the additional length between the hip level and the hem:
Front
Back
Button Band
Button interfacing
button guide
Maintain 3.5” space between buttons.
Change the cutting information of the button band to 2 self and 2 fusible pieces.
Remove the button extension from the center front. The new front pattern extends beyond Center Front by a ½” seam allowance. Both fronts can be cut identically.
Change cutting information of the button band from 1 to 2.

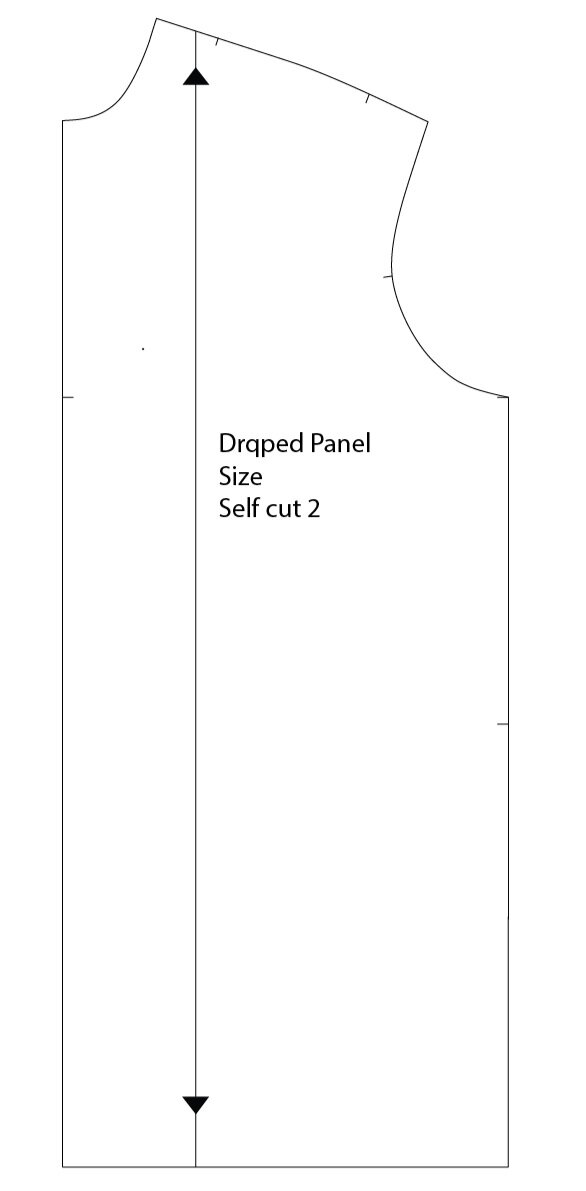
Create the draped panel pattern piece :
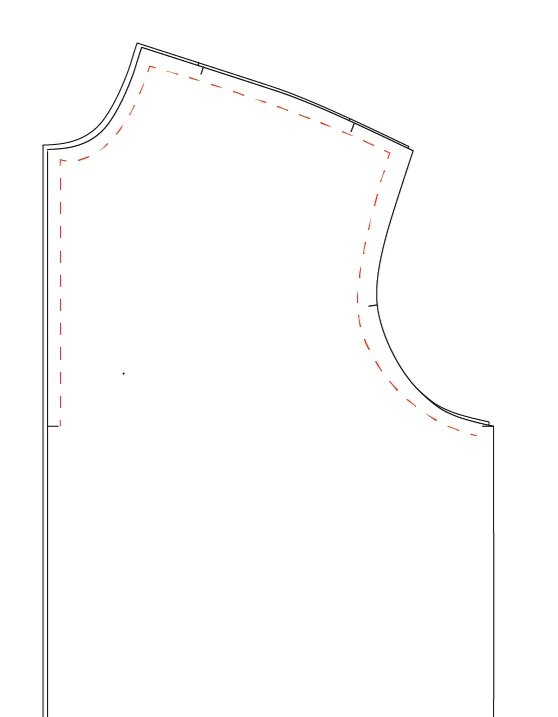
Start with the front pattern piece and trace the bust level with a line starting at the underarm and perpendicular to the center front.
Layer the pattern paper over and copy the front piece above the line you traced, transferring all relevant information such as notches and seam allowances.
Trace a line parallel to the bust level, 24” below (24” is for size 0, add ½ per size so 24 ½ for 2, 25 for size 4, 25 ½ for size 6, etc.).
Join the bust level to the new line, forming a rectangle.
Add a ½ hem allowance at the bottom.
-
Add the new pattern piece information and markings:
Piece Name: Draped panel.
Size.
Grainline: parallel to Center Front.
Cutting information: cut 2.
Notches, including on each side of the bust level.
Construct
Lay the draped panels over the front pieces, and staystitch all around the armhole, the shoulder, the neckline, and center front down to the bust level notch.
Clip that notch up to ½” (1.25cm).
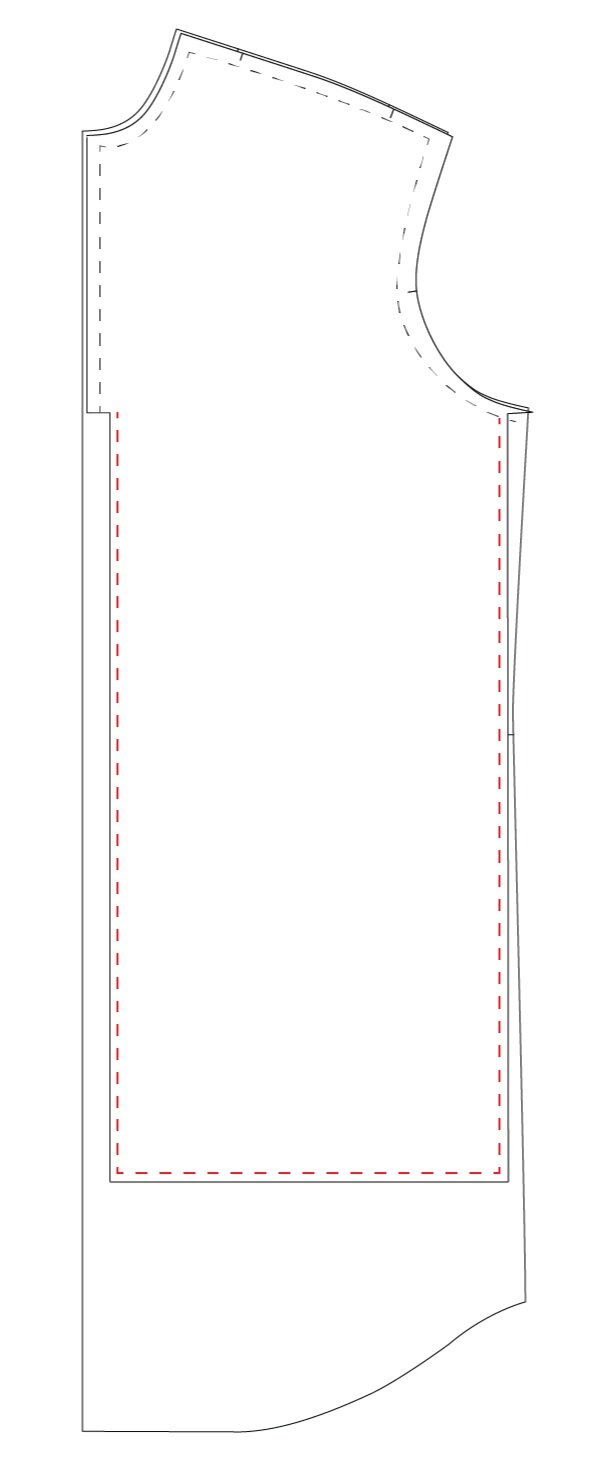
Hem the free of the draped panel by folding ¼” (0,6cm) twice and stitch.
Stitch the button bands on both right and left sides as instructed for the right side.
Continue constructing the shirt as directed by the pattern instructions, treating the front and the draped panel as one.

Embroider the three buttonholes parallel to the center front on the bottom corner of the right panel closer to the front. Use the same spacing to sew the buttons to the bottom corner of the left panel closer to the front.
You are done!

I hope this tutorial inspired you to follow your inspiration and use the patterns you already have in your stash to create the clothes you have a crush on! Do you have a RTW piece you dream to re-create? Please share in the comment 😘.