Dear readers,
As for many of you, 2020 has brought many changes in my life, including on a professional level. I already mentioned the changes related to Just Patterns. But what you may not know is that this summer, I also quit my staff position at my day job to become a freelancer in the same field. Both with my day job and Just Patterns, those changes mean that I am now working mostly alone. And I have to admit that I love it! Some parts of the pattern development process could be hired out reasonably quickly (grading, illustrations, layout). Still, I am thoroughly enjoying have 100% control. After spending over a decade in the corporate world, I sincerely appreciate being the master of my own time, not having to wait on a contractor to revert, or spending time reviewing other people’s work.
The downside of this is that it probably makes things slower, and I have to accept that I cannot do all the things I would like to. This acceptance is something that I have to work on daily, but I think that with practice, I’m slowly getting better. Today, I’m managing to share a first hack of the Tyra tee with you that I initially envisioned as a series to help you get more mileage out of the pattern. Unfortunately, I am deep into the development of the next pattern, and I am not sure how many blog posts I will be able to produce…

But let’s start with today’s hack! It’s inspired by the beautiful Fond sweatshirt of Rachel Comey. It involves very few changes to the pattern (using a sweater knit, lengthening the sleeves, adding a sleeve cuff, and leaving the hem raw). The final garment is a fun and unique sweatshirt!
Supplies
Sweatshirt fabric, add ½yard(40cm) compared to the pattern fabric estimate. Mine is from See You at Six and I bought it from Coup de Coudre.
Coordinating rib knit (also See you at six in my case).
Thread.

Alter
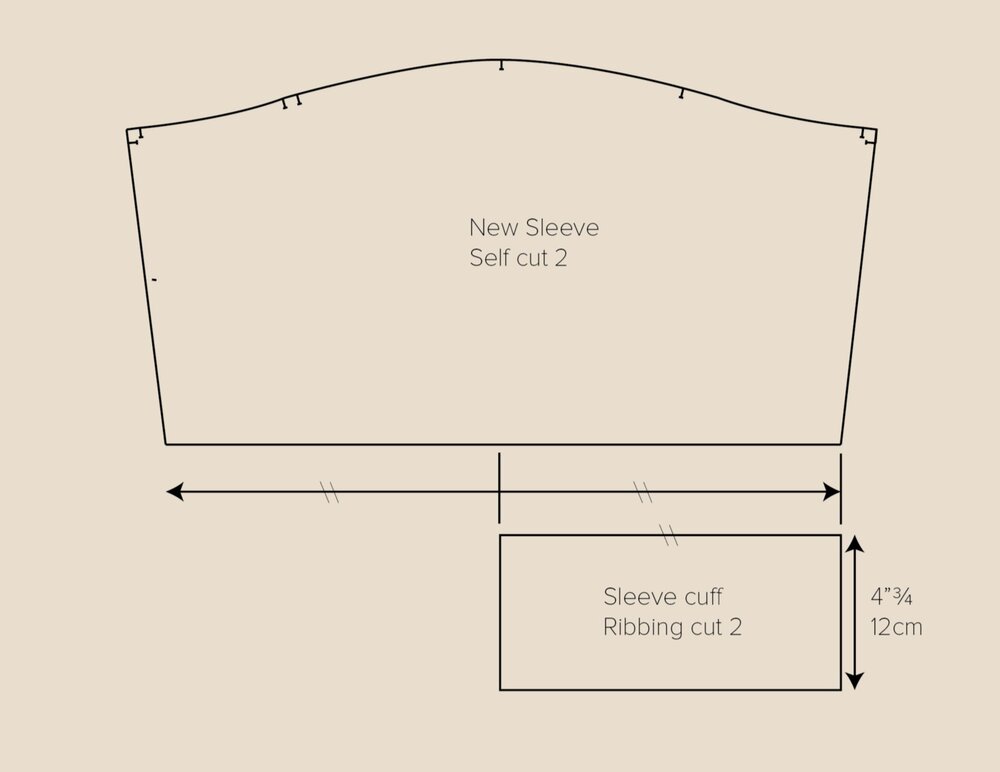
Lengthen the sleeve pattern by 4”¾(12cm).
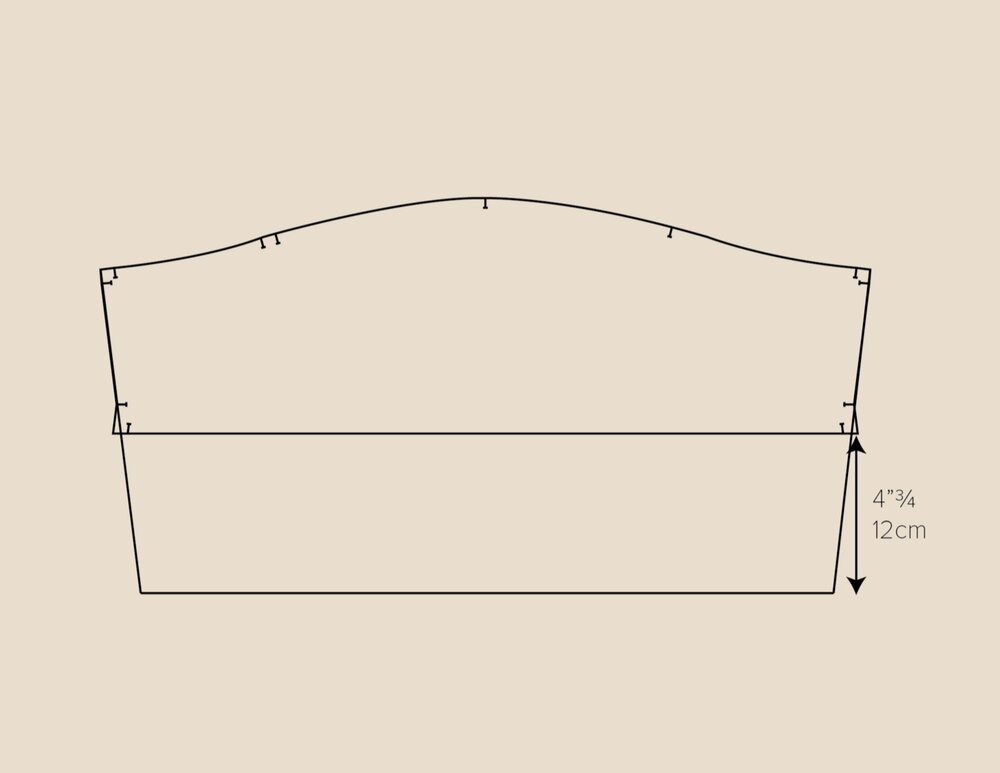
Draft a cuff pattern. The rectangle should measure 4”(10cm) + ¾”(2cm) for seam allowances in height and half the bottom of the sleeve in width.
Construct
Assemble the shoulder seams and the sleeves to the armholes as instructed.
Do not finish the bottom of the sleeves.
Stitch the side seams.
Prepare the neckband and assemble it to the neckline as instructed.
Stitch each cuff piece into a loop, stitching the short edges right sides together with a ¼(0.6cm) seam allowance.
Fold each cuff, wrong sides together.
Stitch the cuffs to the sleeves with a ¼”(0.6cm) seam allowance.
Insert the tails of serger threads at the side seams into the serged seam, using a tapestry needle.


That’s it, you are done. Enjoy your new sweater! There are already many amazing hacks of the Tyra Tee if you check the hashtag on Instagram, for instance by my friend Kate of Time to Sew also turned it into a sweatshirt with a great checked print:

Her changes were a bit different:
She added a 3”⅛(8cm) wide hem band from cotton ribbing: first she removed 3”⅛(8cm) from the body at the hem. Then cut a rectangle 7”(18cm) wide, length 85% of total hem circumference. Sew together the short ends using a ⅜(1cm) seam allowance. Then press in half, wrong sides together, and attach to the body.
She extended sleeve piece by 7”¾(20cm).
She added 3”⅛(8cm) wide sleeve cuffs: cut rectangle 7”(18cm) wide, length 85% of the circumference of the sleeve, sew the same way as the hem band.
I hope to be able to share more ideas to hack the Tyra Tee soon. But in the meantime, I would love to hear your thoughts on working alone vs. in a team!